

Table of contents
So, when we start writing CSS, most of us use class and id selectors. Which is fine, but assigning classes to every other element can be tedious. By the end, I'd learned several new CSS selection methods that will make our lives easier in the long run. We will look at some of the most basic and common CSS selectors with examples so that we can apply them to our regular CSS writing. OK, so let's get started.
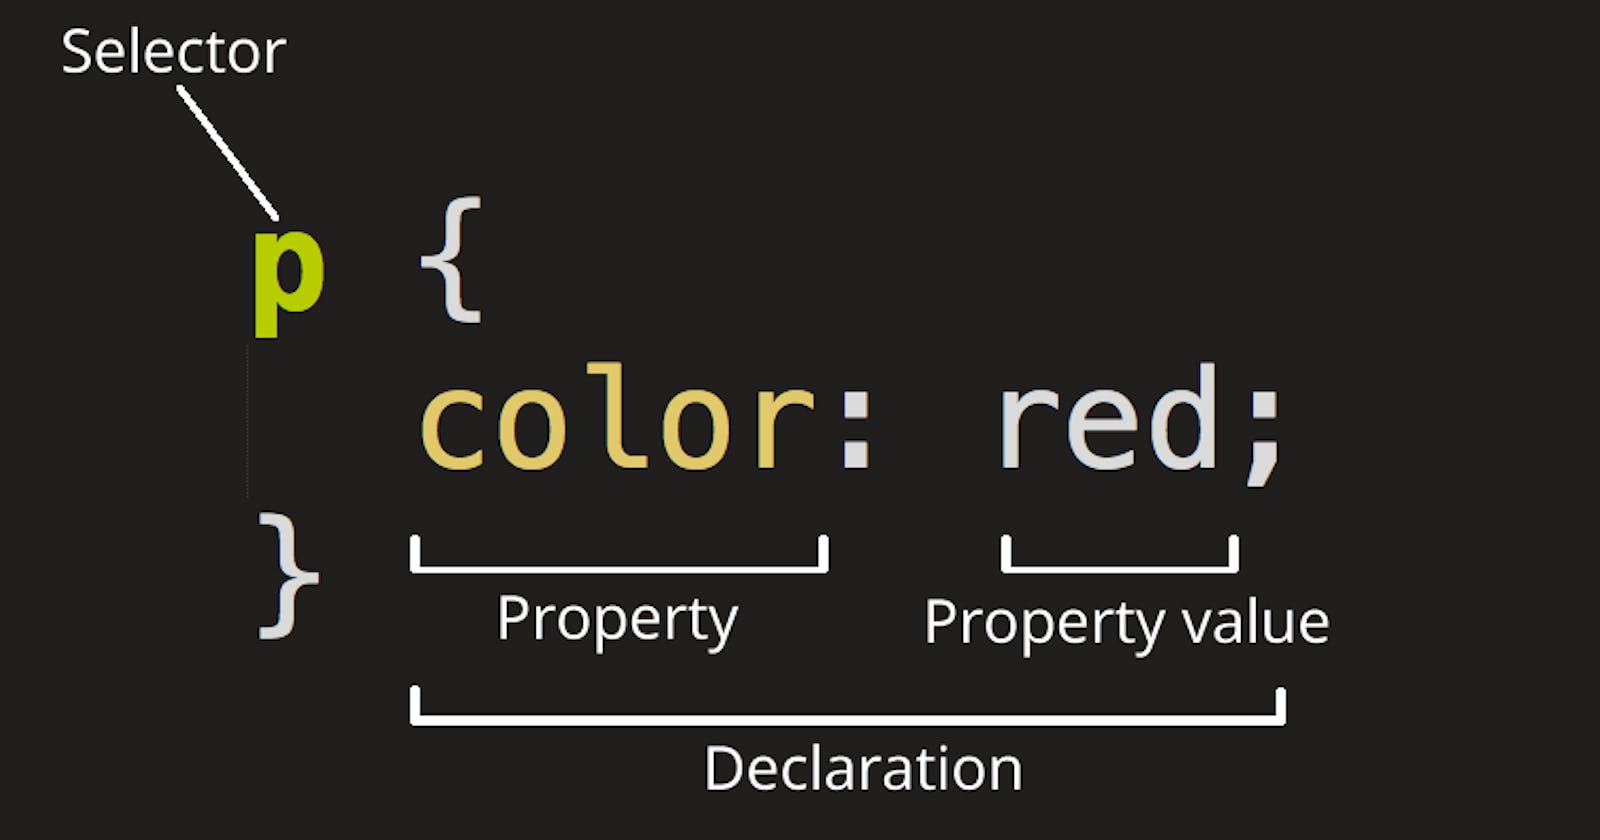
What exactly are CSS selectors?
CSS selectors are used to select the HTML elements you want to style.
For example, If we want to change the text color of a paragraph, <p> This is a paragraph </p> We first need to select that paragraph, either with an Element selector , Class selector, or Id selector. Then we can change the color of the text and do many more styles with CSS.
Types of selectors
There are different types of selector. We start with the basics and move to some of the more complex ones.
1. Element Selector
- The element selector selects HTML elements like
<h1>,<p>and<img>based on the element name.
<h1> Hello World </h1>
h1 {
      font-size: 80px;
      color: green;
}
✔ In the above example, all
<h1>elements on the page will be selected and have a font-size of 80px , with a green text color.
2. Id Selector
- The id selector uses the id attribute to select an element.
- The id of an element has to be unique within the page.
- We put a hash (#) character before the id name to be selected.
<h1 id="heading"> hello world </h1>
#heading {
      font-size: 80px;
      text-transform: capitalize;
}
✔ In the above example, elements with an
id="heading"on the page will be selected and have a font-size of 80px , and text-transform to capitalize.
3. Class Selector
- The class selector uses the class attribute to select an element.
- We put a period (.) character before the class name to be selected.
<p class="para"> This is a paragraph </p>
.para {
      color: red;
      text-align: center;
}
✔ In the above example, elements with a
class="para"on the page will be selected, and it will be center-aligned and have red color text.
4. Universal Selector
- Universal selector (*) selects all HTML elements on the page.
* {
      background-color: lightblue;
      color: darkblue;
}
✔ In the above example, CSS rule will affect every HTML element on the page.
5. Grouping Selector
- A grouping selector is used to minimise the code.
- The grouping selector selects all the HTML elements that have the same style.
- In group selector, we separate each selector with a comma.
.para1 {
       font-size: 20px;
       text-align: center;
}
.para2 {
      font-size: 20px;
      text-align: center;
}
.para3 {
      font-size: 20px;
      text-align: center;
}
✔ The styles of
.para1.para2and.para3in the above example are the same.
.para1,
.para2,
.para3 {
      font-size: 20px;
      text-align: center;
}
✔ In the above example we have grouped the selectors to minimize the code.
6. Chaining selectors
- Chaining selectors selects the element that has all the specific class attributes , id attributes, or both.
- When writing this selector, we do not give space or put a comma in between.
<p class="para1 black">This is black paragraph</p>
<p class="para1 red">This is red paragraph</p>
.para1.red {
      font-size: 20px;
      color: red;
}
✔ In the above example, it select all the element which has both
.para1and.redclass.
7. Attribute Selectors
- Attribute selectors help us to style HTML elements that have specific attributes or attribute values.
<input type="text" name="name" />
<input type="email" name="email" />
<input type="button" value="Submit" />
input[type='text'] {
display: block;
background-color: #d9d9d9;
color: slateblue;
}
✔ In the above example, it select all the
inputelement with a attributetype="text".
8. Descendant Selector
The descendant selector help us to select elements that are located underneath other elements.
Every selector is separated by a space.
<div>
     <p> Paragraph 1 </p>
     <p> Paragraph 2 </p>
     <section>
       <p> Paragraph 3 </p>
     </section>
</div>
<p> Pragraph 4 </p>
<p> Pragraph 5 </p>
div p {
      font-size: 20px;
      color: limegreen;
}
✔ In the above example, it selects all
<p>elements that are inside<div>elements. It selectsParagraph 1Paragraph 2andParagraph 3.
9. Child Selector
- The child selector selects all elements that are direct children of a specified element.
- For this selector, we use the greater than sign (>). The left side of > is the parent element, and the right side is the child element.
<div>
     <p> This is paragraph 1 </p>
     <section>
        <p> This is paragraph 2 </p>
     </section>
</div>
<p> This is pragraph 3 </p>
div > p {
      font-size: 20px;
      color: limegreen;
}
✔ In the above example, it selects all
<p>elements that are direct children of a<div>element.<p> This is paragraph 1 </p>will be selected.
10. Adjacent Sibling Selector
The adjacent sibling selector is used to select an element that comes immediately after the specified element.
Sibling elements must have the same parent element, and we separate both selectors with a plus sign (+).
- Syntax
former_element + target_element { style properties }
<ul class="menu">
      <li> Home </li>
      <li class="service"> Service </li>
      <li> Product </li>
      <li> About Us </li>
      <li> Contact Us </li>
</ul>
.service + li {
      color: red;
}
✔ In the above example, it selects the first
lii.e<li> Product </li>because it comes immediately afterclass="service"elements.
11. General Sibling Selector
- The general sibling selector selects all elements that are next siblings of a specified element.
- Sibling elements must have the same parent element, and we separate both selectors with a Tilde sign (~).
- Syntax
former_element ~ target_element { style properties }
<ul class="menu">
      <li> Home </li>
      <li class="service"> Service </li>
      <li> Product </li>
      <li> About Us </li>
      <li> Contact Us </li>
</ul>
.service ~ li {
      color: red;
}
✔ In the above example, it selects all the
<li>which comes after<li class="service">Service</li>.
Conclusion
Alright everyone, we've reached the end. We've gone over the most common selectors in CSS. Check out these resources for a more comprehensive overview of CSS selectors.
Thanks so much for reading ! Keep on coding !